
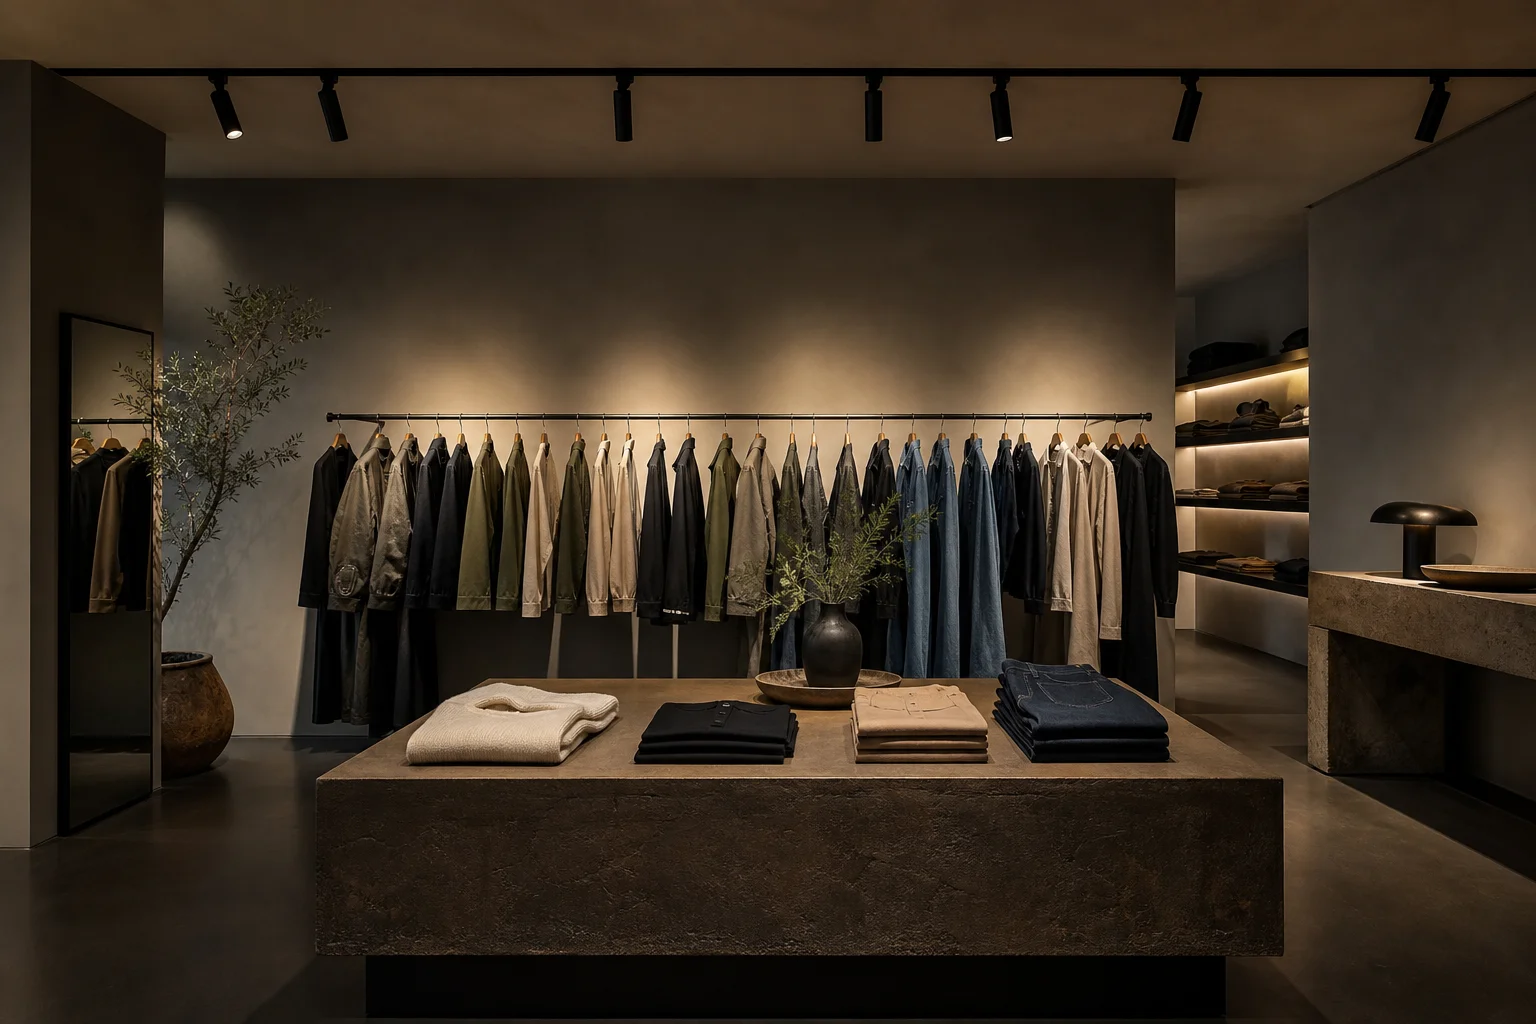
Retail lighting is sales engineering. Every fixture in a store should be there because it makes products look better and sells more. The lighting that makes the space look “nice” is secondary to the lighting that makes the customer pick up a product and carry it to the till. This guide covers the hierarchy, the numbers, and the common traps.
The Hierarchy
Retail lighting operates in three layers, but the proportions are different from residential:
- Ambient (30% of total light): General navigation lighting. Enough to see the floor plan, read signage, and move safely. Not enough to evaluate merchandise. This is your ceiling wash or perimeter coving.
- Task (50% of total light): Merchandise lighting. This is where the budget goes. Track spots aimed at product, display case lighting, and feature table lighting. This is the light that makes the product look good.
- Accent (20% of total light): Feature and focal displays. Window displays, mannequins, hero product walls. Brighter than task lighting by 20–30%, creating a focal point that draws the eye from the entrance.
Track Spot Spacing and Angling
Track spots should be 900–1200mm apart on the track. Closer than 900mm and the beams overlap excessively, flattening the display. Further than 1200mm and you get dark gaps between merchandise.
Every spot should be angled at 30–45° from vertical — not straight down. This is called the “aiming angle.” It reduces glare reflected off shiny merchandise back into the customer’s eyes, and it gives the product dimensional lighting that reveals texture and form rather than flattening it with top-down light.
Beam Angles by Merchandise Type
Clothing racks: 24–36° (narrow). You’re lighting a vertical surface (garments on a rail), not the floor. A narrow beam concentrates light on the product. A wide beam lights the rack, the floor, and the customer — wasted light.
Display tables (folded stacks, accessories): 60° (wide). You need even coverage across a horizontal surface. A narrow beam creates a bright circle in the centre and darkness at the edges of the table.
Window displays: 15–24° (very narrow). The window is competing with daylight. You need punch — a focused, intense beam that cuts through the ambient brightness from outside. Wide beams in a window display disappear during the day.
Colour Temperature
3000K for warm retail — boutique fashion, hospitality, homeware, furniture. Warm light makes products feel premium and approachable. 3500K–4000K for clean retail — jewellery, electronics, pharmacy, cosmetics. Cool light reads as clinical and precise, which suits products where accuracy and detail matter.
Never mix temperatures in the same store. A 3000K clothing section next to a 4000K cosmetics counter looks like two different shops. If the store sells mixed categories, pick the temperature that suits the majority product and accept the compromise.
CRI: 90+ Non-Negotiable
CRI 90+ is the minimum for any retail environment where colour is a selling point. Textiles, paint, cosmetics, food — all rely on accurate colour rendering. A CRI 80 light source will make a red dress look maroon and a navy shirt look black. The customer takes the product home, sees it in daylight, and returns it.
If you’re lighting an art gallery or a paint showroom, specify CRI 95+. The closer to daylight, the more accurate the colour match.
The Glare Trap
The most common retail lighting failure is spots aimed at merchandise that also hit shoppers’ eyes at the end of an aisle. You’re browsing a clothing rail, you look up, and a 3000-lumen spot is aimed directly at your face. It’s uncomfortable, it’s disorienting, and it makes customers leave the aisle.
The fix is the aiming angle. At 30–45° from vertical, the beam hits the product, not the customer’s eye line. If you must light a rail from directly in front, use a snoot or honeycomb louvre on the fixture to control the beam spread.
Dimming and Daylight
Retail lighting should adjust through the day. At midday, when natural light floods through the entrance and windows, the store’s ambient lighting competes with daylight and looks weak. Increase ambient brightness by 20–30% during daytime hours.
In the evening, when the store glows from the street and the interior becomes the visual draw, dim everything by 20–30%. The store becomes warmer, more intimate, and more inviting. A store that runs at 100% from open to close is leaving atmosphere on the table.
This requires a dimming system — either a programmed scene controller or manual dimmers with a briefed store manager. Either way, the lighting should not be a single setting that runs all day.
Written by REO